Draw Phylogenetic Tree From Alignment
Creating phylogenetic tree in Genome Workbench from search
Please use the sample project to follow this tutorial.
Create a set of sequences
Sequences can be added into Genome Workbench project from search result, uploaded from GenBank by accessions, or uploaded from FASTA file.
In Genome Workbench open Search View, for Search Tool select "Search NCBI Public Databases", for NCBI Database select "Nucleotides", in search box add query: "Severe acute respiratory syndrome coronavirus 2"[organism] AND "complete genome" AND "USA: MD"[country] and hit Start. Search returns complete genomes for covid19 currently collected in state Maryland (75, as for 8/10/2020). Select all of them using Shift+click, open right click context menu and Add to Project/Create a new Project.
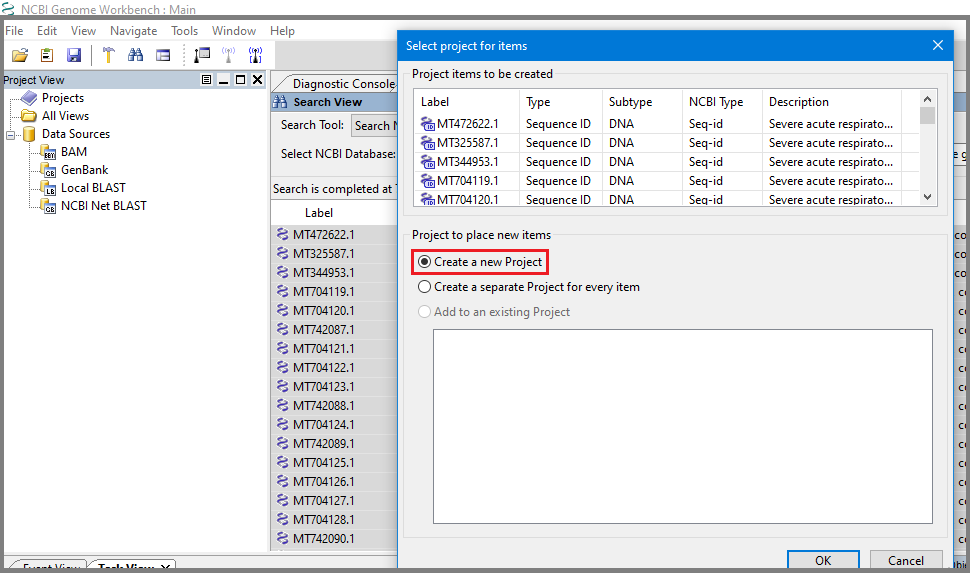
See all accessions were added to the newly created project.
If you want to add some other complete covid19 genomes and know genome accession numbers, they can be added to the same project directly from GenBank. Let add NC_045512(China), MT748758(Italy), MT655135(Spain), MT637143(Russia) via File/Open/Data from GenBank (copy and paste: NC_045512, MT748758, MT655135, MT637143), click Next/Add to an existing Project/Finish.

Find newly added genomes at the end of the list of accession in the project.
Sequences can be uploaded into project from fasta file as well (see Multiple Sequence Aligners manual).
Create multiple alignment
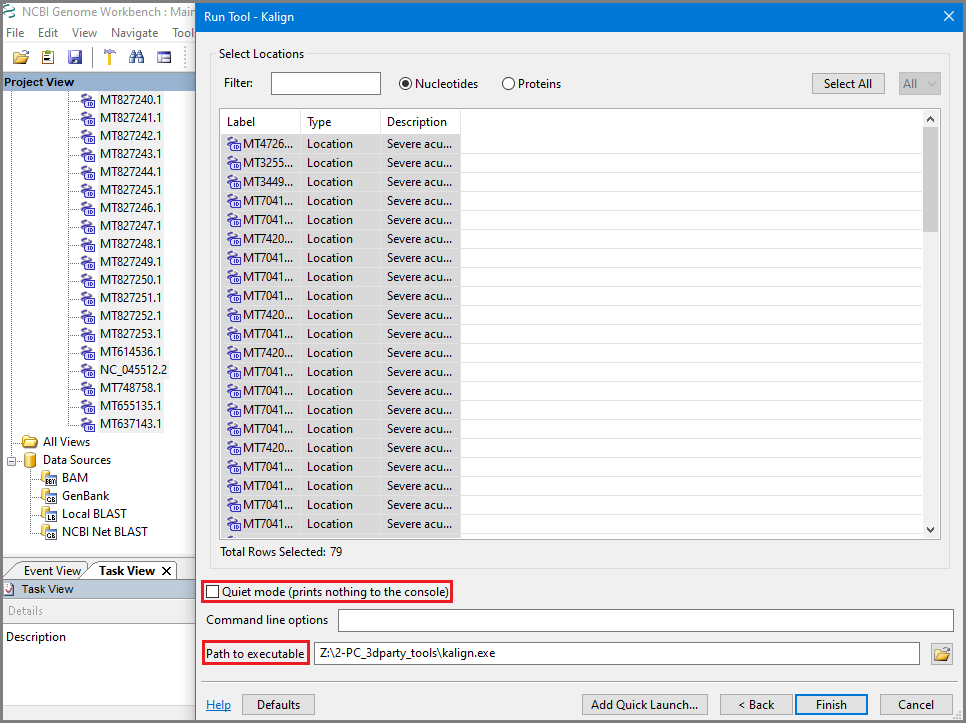
To create multiple alignment, select all accessions in the project (Shift+click) and select Run Tools option in the context menu or upper panel. In Run Tool dialog find section "Multiple Sequence Aligners" and select Kalign or MAFFT (alignment construction by MAFFT for the current set takes less than a minute, by Kalign - 10-15 min):

In the Run tool Kalign or MAFFT dialog uncheck Quiet mode to see how job is running and add local path to the aligner executable (should be downloaded and installed before, see more explanation in the Multiple Sequence Aligners manual).
Observe job is running in console:

When the job is finished, see that alignment file was added to the project. Open it in the Multiple alignment view (select file in the Project view/open context menu/select open in Multiple Sequence alignment view):

Note: If you use Clustal Omega or ClustalW2 aligners for your set of sequences, there is an option "Return guide tree used for alignment". This guide tree is used to align sequences in the order of similarity and can be opened in Tree view. If you use MUSCLE program, it has option "Generate reconstructed tree from alignment" which is also returned guide tree used for the final alignment construction.
Tree Construction
To construct a fast/rough tree based on the alignment, select alignment again, open Tools and select Phylogenetic Tree builder Tool.
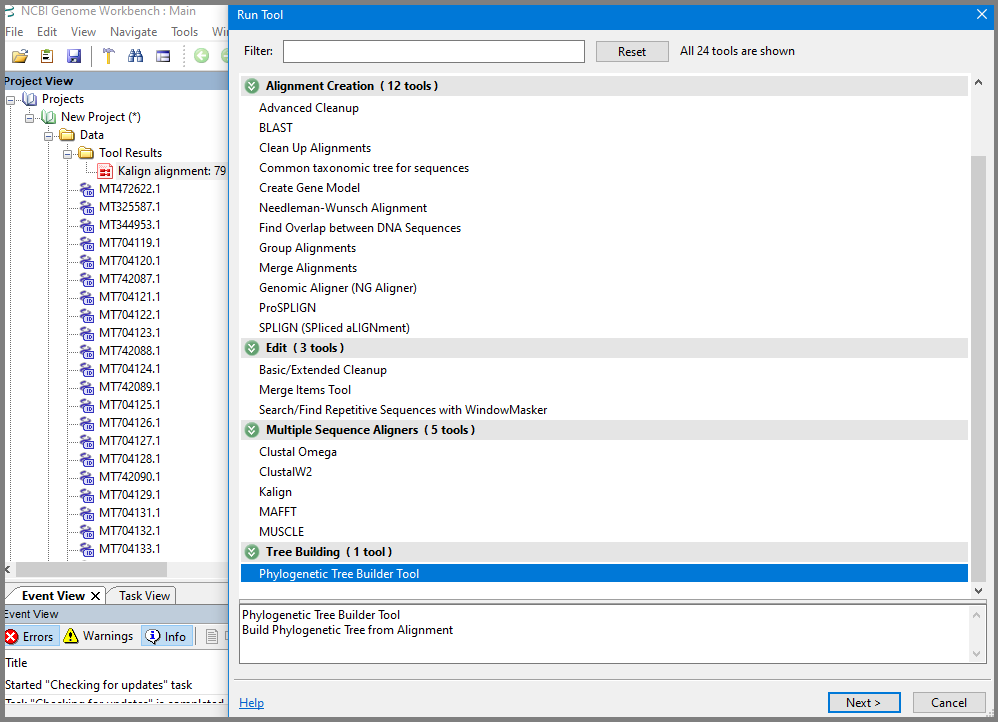
In the "Run Tool – Phylogenetic Tree Builder Tool" dialog select alignment (if not selected by default), and select Distance Method (Poisson (protein), Kimura (protein) or Jukes Cantor (DNA)), Tree Construct Method (Neighbor Joining or Fast Minimum Evolution) and Labels for Leaf Nodes representation, and click Finish.

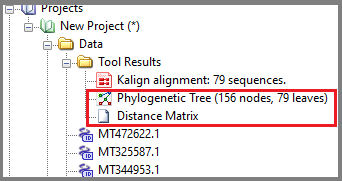
Wait for tree construction and find newly created tree and distant matrix added to the project:
Note: Tree created outside of GBench can be uploaded in Newick format or ASN format to a new project and viewed/analyzed in GBench.
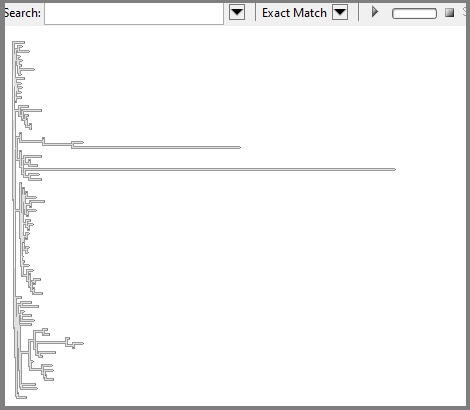
Select Tree file in the project view and open in Tree View. Tree opens at zoom 0:
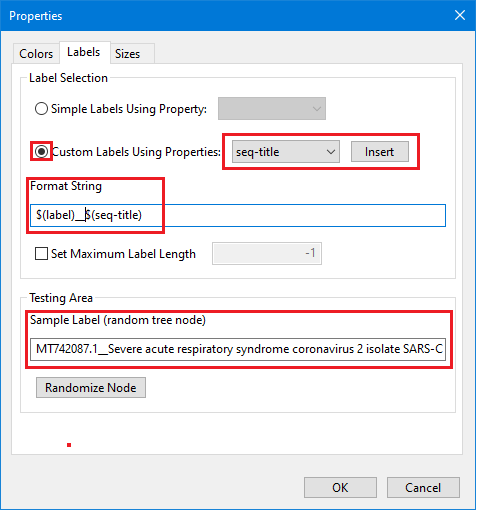
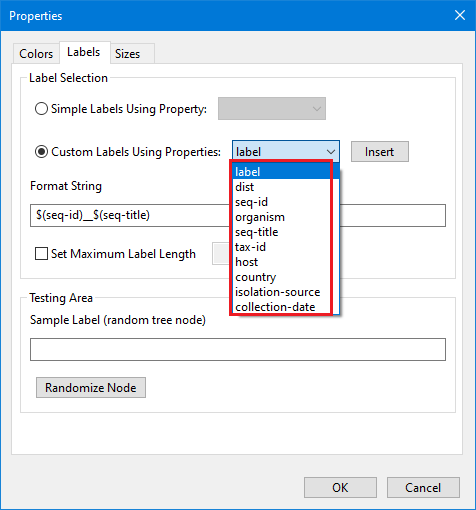
Right click to open context menu and see set of options that can be used for a tree manipulation. For our tree we used: layout - rectangle cladogram, zoom behavior - vertical, re-root - set midpoint root. For the leaf node labels we select settings/labels/custom labels using properties and set up $(label)_$(seq-title) in this "Properties" dialog (note: these custom labels is a combination of available leaf's nodes properties):
For complete set of tree manipulation/editing options see the Using Tree View tutorial.
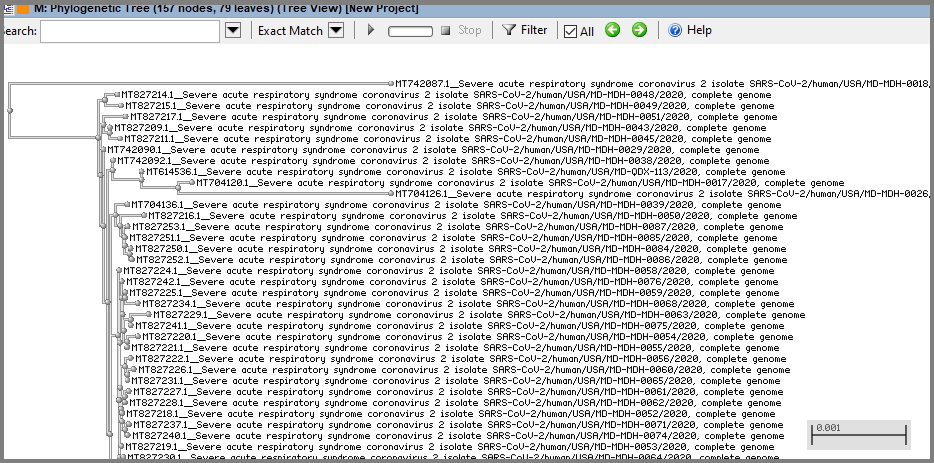
In tree view, zoom in to the level where individual labels are seen and see custom labels:
Since for this tree we used sequences of different isolates of the same virus, the distances are very short. To see topology clearer, adjust distances using horizontal zooming (Zoom behavior/horizontal option in the context menu). Also, you can use slanted layout that allows you to see topology only (without distances).
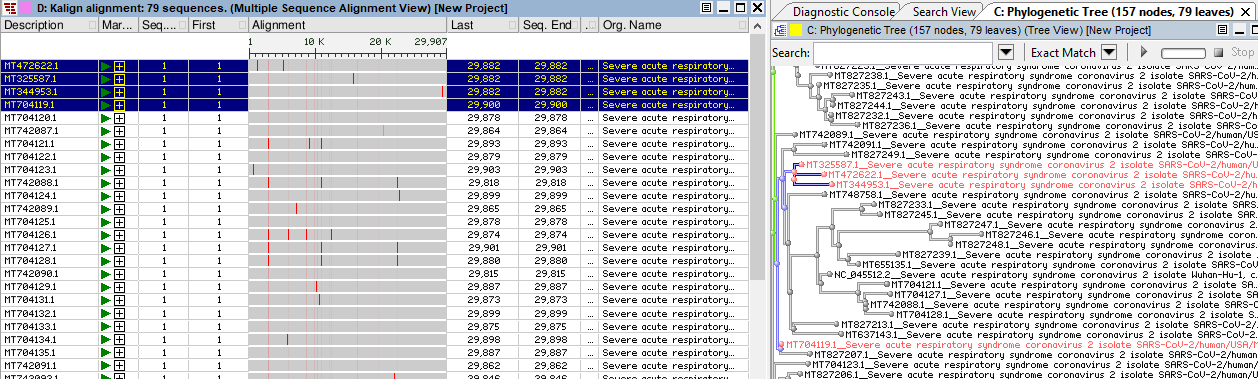
Alignment and tree can broadcast to each other. To check where particular sequence is placed in the tree, open alignment and tree in two side by side windows and select sequence in alignment or branch in the tree, and notice that the corresponding branch/sequence in the alignment or tree view will be selected.
4. Search tree and mark nodes/labels by different color
Trees constructed based on GenBank/RefSeq sequences have some additional information if present in the GenBank record, such as: an isolation source, collection date, etc. See for example Source section for the record NC_045512. All available information can be seen when the tree is opened in the Generic Table view:
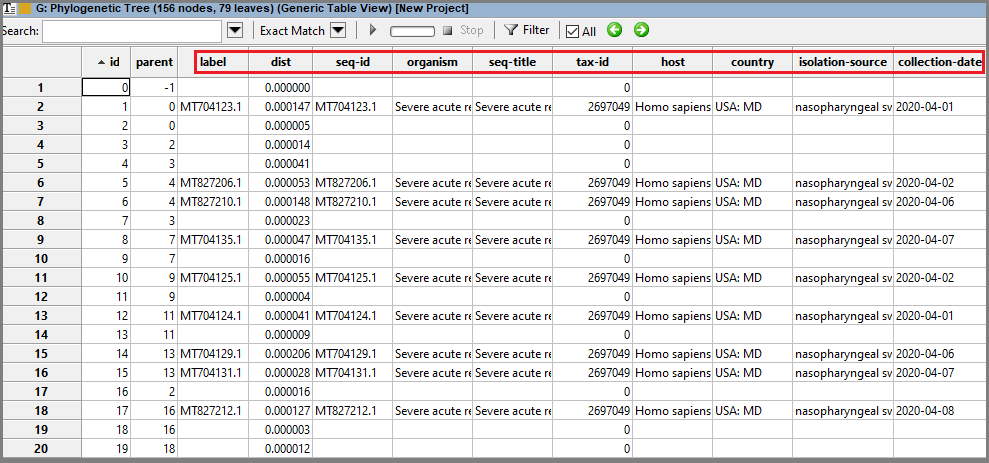
This information is present in the leaf's node tooltips, in the Node Properties dialog (can be opened by clicking the " i " button in the node tooltip, or by selecting node and opening the right click context menu and selecting Properties), and in the Properties dialog (can be opened from the right click context menu and selecting the Label tab):


Tree is searchable by any properties that are available for the tree, even if this information is not a part of the labels. Let's find and color genomes that we added as accessions from GenBank directly in part 1 of this tutorial (NC_045512, MT748758, MT655135, MT637143). As a query we can use direct accession number, for example NC_045512, or part of the seq-title, like "Wuhan", or any available property, for example: "country = China". Search result will be selected:

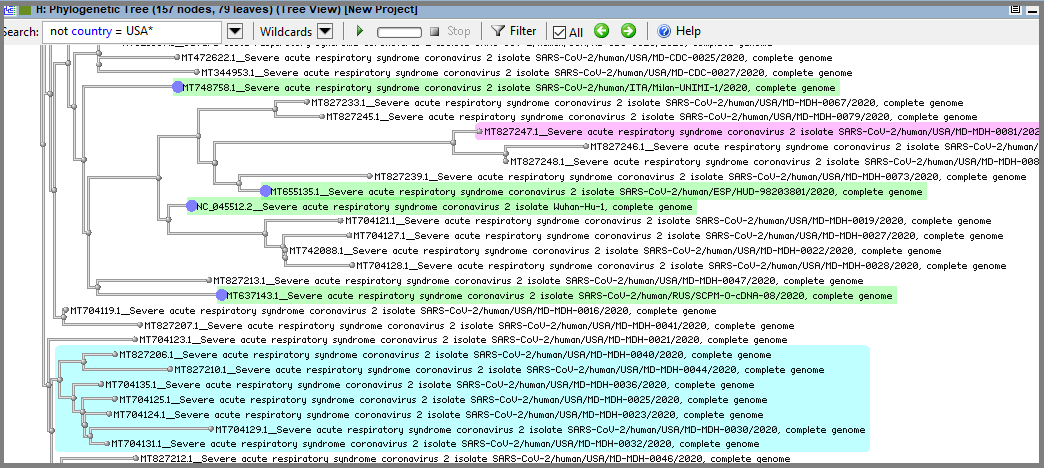
To find all four samples from other countries (not USA) in one search we can use following queries: "not country = USA: MD" (for Exact Match) or "not country = USA*" (for Wildcards). Both will give the same result with four leaves selected (note that this search will select not leaf's nodes as well):

To learn more about search query construction see Query Syntax manual.
Now let's mark nodes/branches by color. Hover over one of the selected leaves to open tooltip. In tooltip click on the " i " icon to open Nodes Properties dialog (or use right click context menu, Properties option). In dialog, add new property: type "marker" in the Name box, select color for Value, and click Add button. Observe that new property was added to the node properties list:

Click OK button and see that selected node now has new color and size. (Note: if you want to change size of node, add parameter size to the Value of marker property and click Update button, the new Value should look like this [128 128 255 64] size=1).
To highlight some branches or subtrees use property $NODE_BOUNDED and add color value (by default it uses values shape=Rectangle and IncludeText=true).
For more information about coloring/shape parameters see Tree Viewer Formatting manual.
Create custom labels
Now let's try to create custom labels. For example, make new label "COVID19-ITALY" for the isolate from Italy. Open context menu and select option Settings. In the Properties dialog select tab Labels, confirm that current labels is combination of $(label)_$(seq-title) properties and close dialog. Now perform right click on the label you want to change and select option Properties. In the Node Properties dialog/Properties list select seq-title, change existing value into COVID19-ITALY, click Update button, observe that value has been changed in the list and click OK button:

See that value has been changed in the tree:

Custom labels can be added to the internal nodes too. Since one of the properties that used for current names is label ($(label)_$(seq-title) ), we can use Edit Label dialog, and new value for $(label) will be visible for collapsed branches. Collapse some branches, perform right click on the base node of the collapsed subtree and select Edit Label option in context menu. In the Edit Label dialog type new label, for example "Samples from 5 countries":
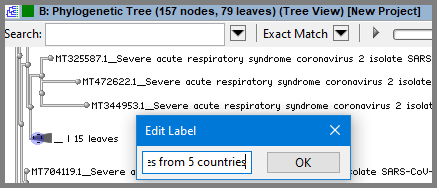
Click OK and observe new label for collapsed branch was created.

For future analysis, the tree can be saved as GBench project and also downloaded in ASN.1, Newick, and PDF formats.
Source: https://www.ncbi.nlm.nih.gov/tools/gbench/tutorial29
0 Response to "Draw Phylogenetic Tree From Alignment"
Post a Comment